Caulk Removal and Caulk-Substitute Installation Directions – pFOkUS

SEO pFOkUS, July 9, 2020

Has your shower caulk deteriorated? Are you trying to remove it and then thinking of installing a new one? Wait, we have a better solution for you. Shower caulk removal and installation is no child’s play. This caulk that had sealed your corners for a few months, will keep getting damaged after every few months. Furthermore, if you do not remove it properly, it will ruin the appearance of your tile. Before we tell you about our better solution, let us know how to remove the old caulk in the right way.
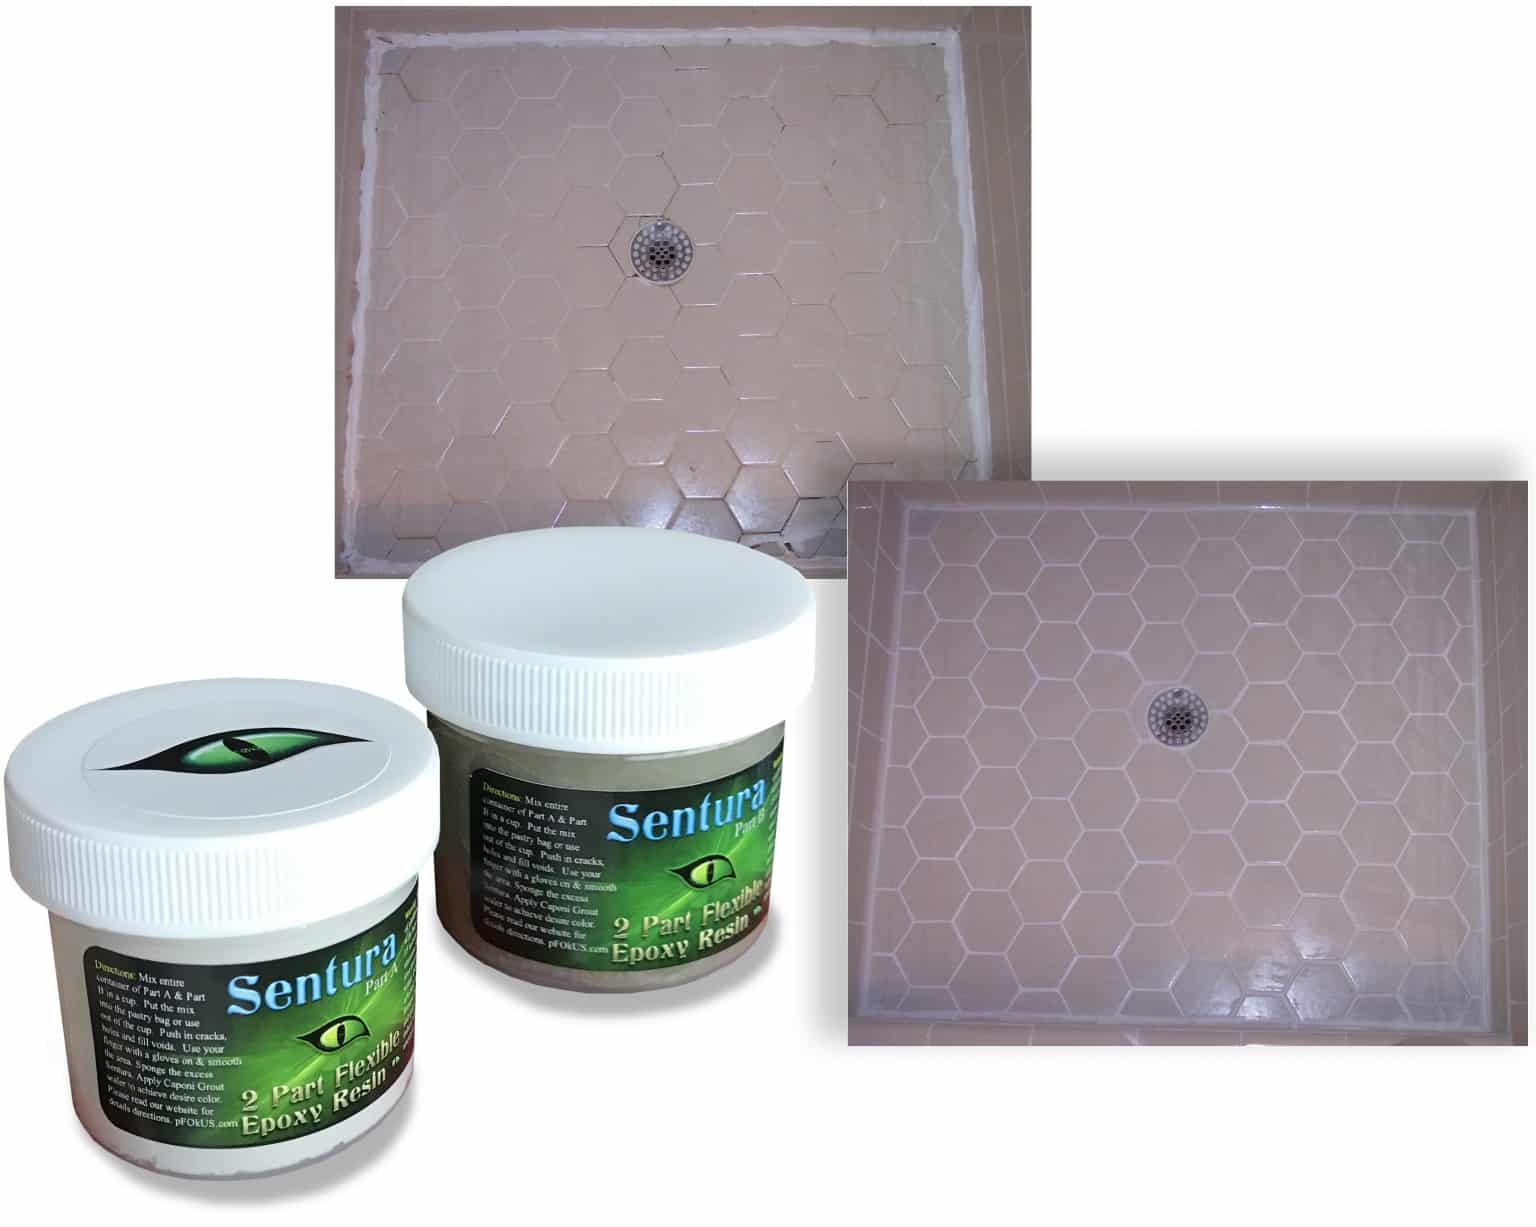
caulk removal and installation directions - pFOkUS

pFOkUS – a paramount stone, tile, grout, and glass restoration products manufacturing company advises its customers not to use silicone or acrylic caulk to seal the corners of the shower tile. Caulk starts peeling in wet conditions and begins to crack in dry settings. Within a few months, you will find your caulk deteriorating and turning blackish green due to mold formation.

If you sail in the same boat, then you first need to remove your damaged caulk properly. Here are caulk removal directions explained in-depth, so that you do not end up damaging the surface.

Caulk Removal Directions – by pFOkUS:

These directions guide you to remove caulk and grout in the corners. Only when you remove the existing caulk properly, can you create the perfect surface to fuse our caulk-substitute properly.
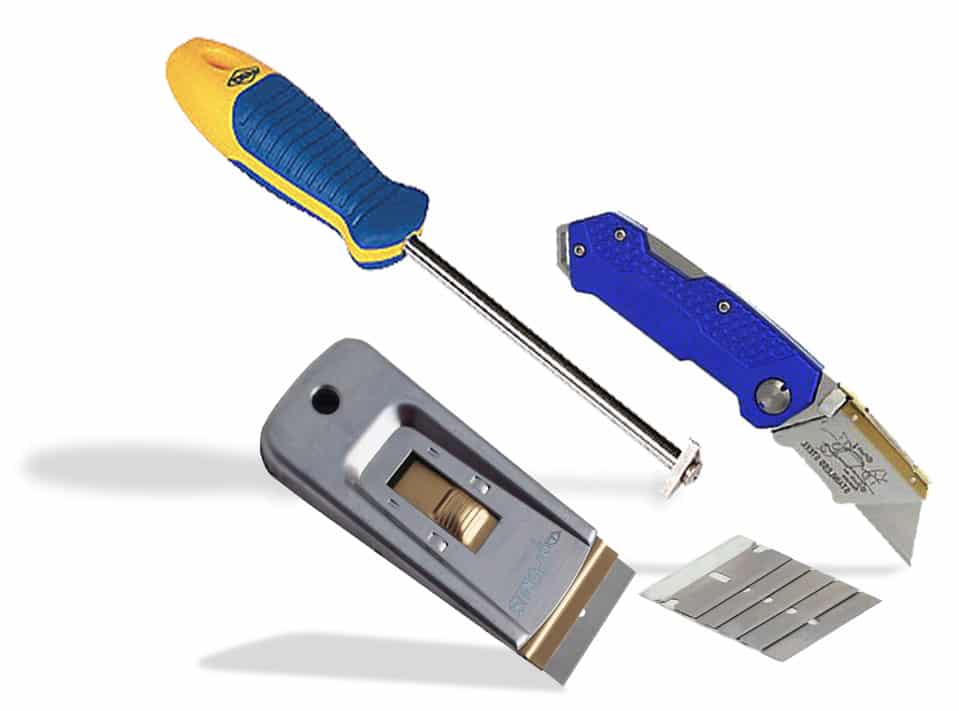
Caulk Removal kit - pFOkUS

Arsenal Required:

  • Triangle grout removal tool (just in case your grout is too rigid)
  • Razor scraper with 5 extra blades
  • Utility Knife

Directions:

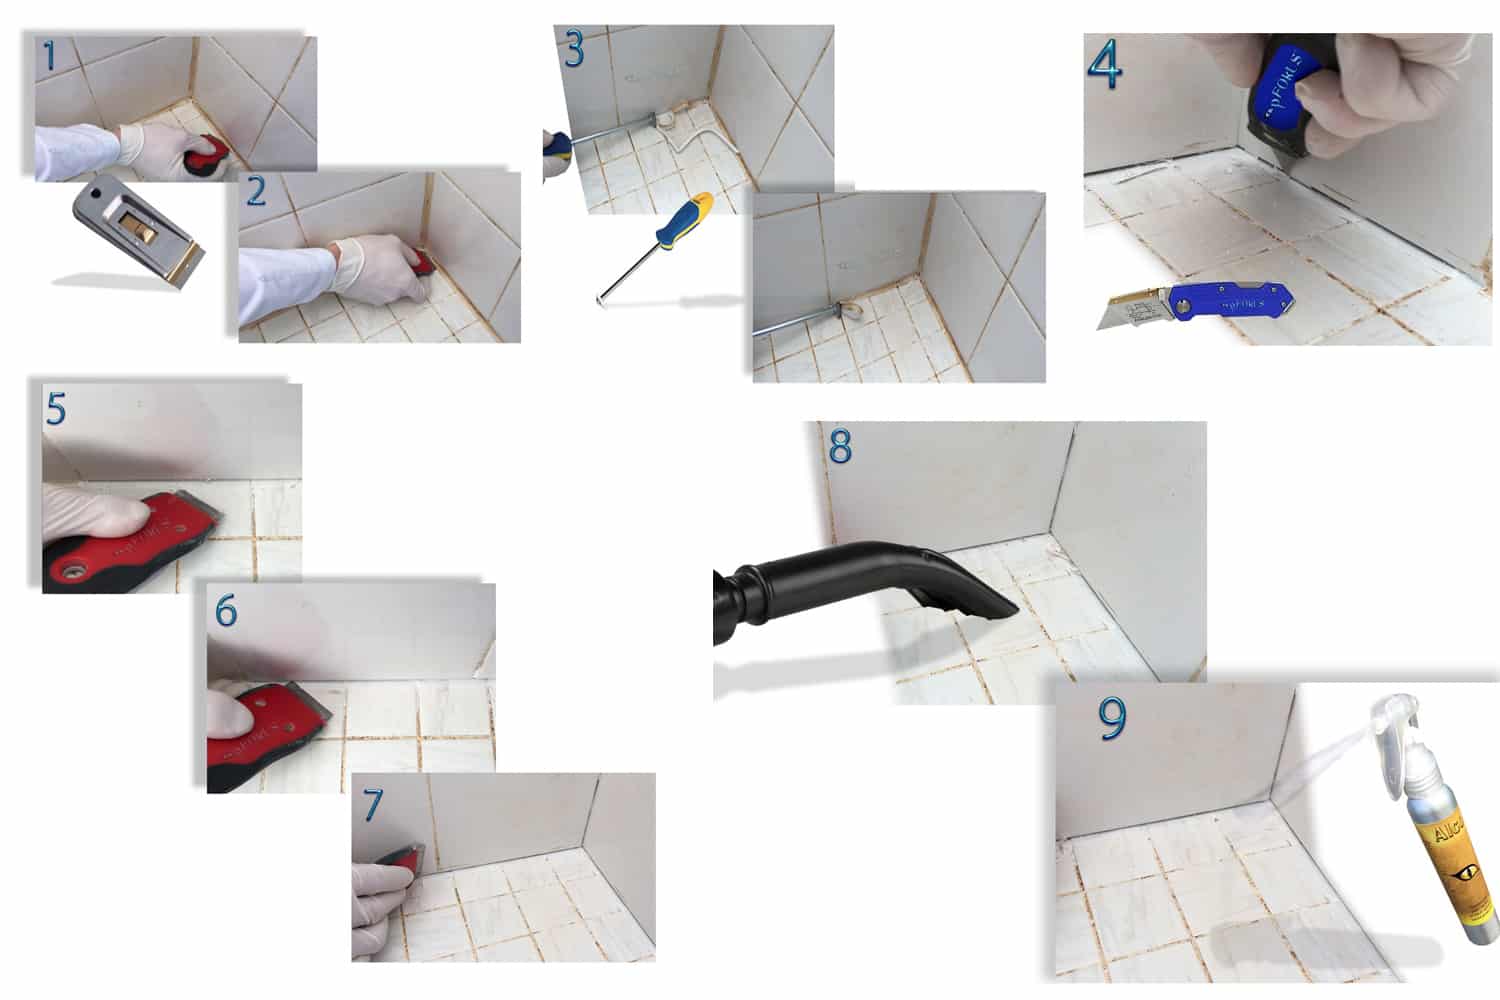
Caulk-Removal - Directions- pFOkUS

  • First, take the razor scraper and glide it along the caulk line on top and bottom, cutting the edges loose.
  • Also use the scraper in the corners to remove the caulk from there.
  • If after scraping the caulk does not come off easily, it is probably still bonded to the surface at the joints and sides.
  • Next use the triangle grout removal tool to remove the stubborn caulk left behind after using the razor scraper. This tool is recommended by pFOkUS team as it does not damage the surface and also removes the grout in the joints.
  • Again use the razor scraper to remove any caulk left behind in the grout joints.
  • Remove all the caulk residue remaining on the tile.
  • Also remove any grout particles remaining on the sides and edges, making a clean surface.
  • Lastly, clean up the debris. You can vacuum up the fine debris and sweep up the bulk pieces.
  • It is recommended that you clean up the area with Imperia Deep Clean – a powerful and deep-penetrating cleaner from pFOkUS, so that you get a thoroughly prepped and sanitized surface.
  • If you are not going to clean the area with Imperia Deep Clean, you may also use Alco – our paint thinner and reducer, to wipe up the edges, removing all oil and soil remnants.

With this procedure, you have eliminated your grout caulk for good. This is the first part of the caulk removal and installation process. We will now proceed to using our caulk-substitute.

Caulk-Substitute from pFOkUS:

If you are now thinking of a fresh caulk installation, then we will advise you to use a better product. Our Sentura – a two part pigmented flexible solvent based epoxy/resin, formulated with a 1200psi adhesion. It never pops out from the surface once applied. Sentura protects the floor from bacteria and stains which breed in shower corners. It would not be wrong to call it a shower caulk remover, as Sentura has completely abolished the need to apply caulk. If you are looking for permanent shower corner sealing, then you must use Sentura.
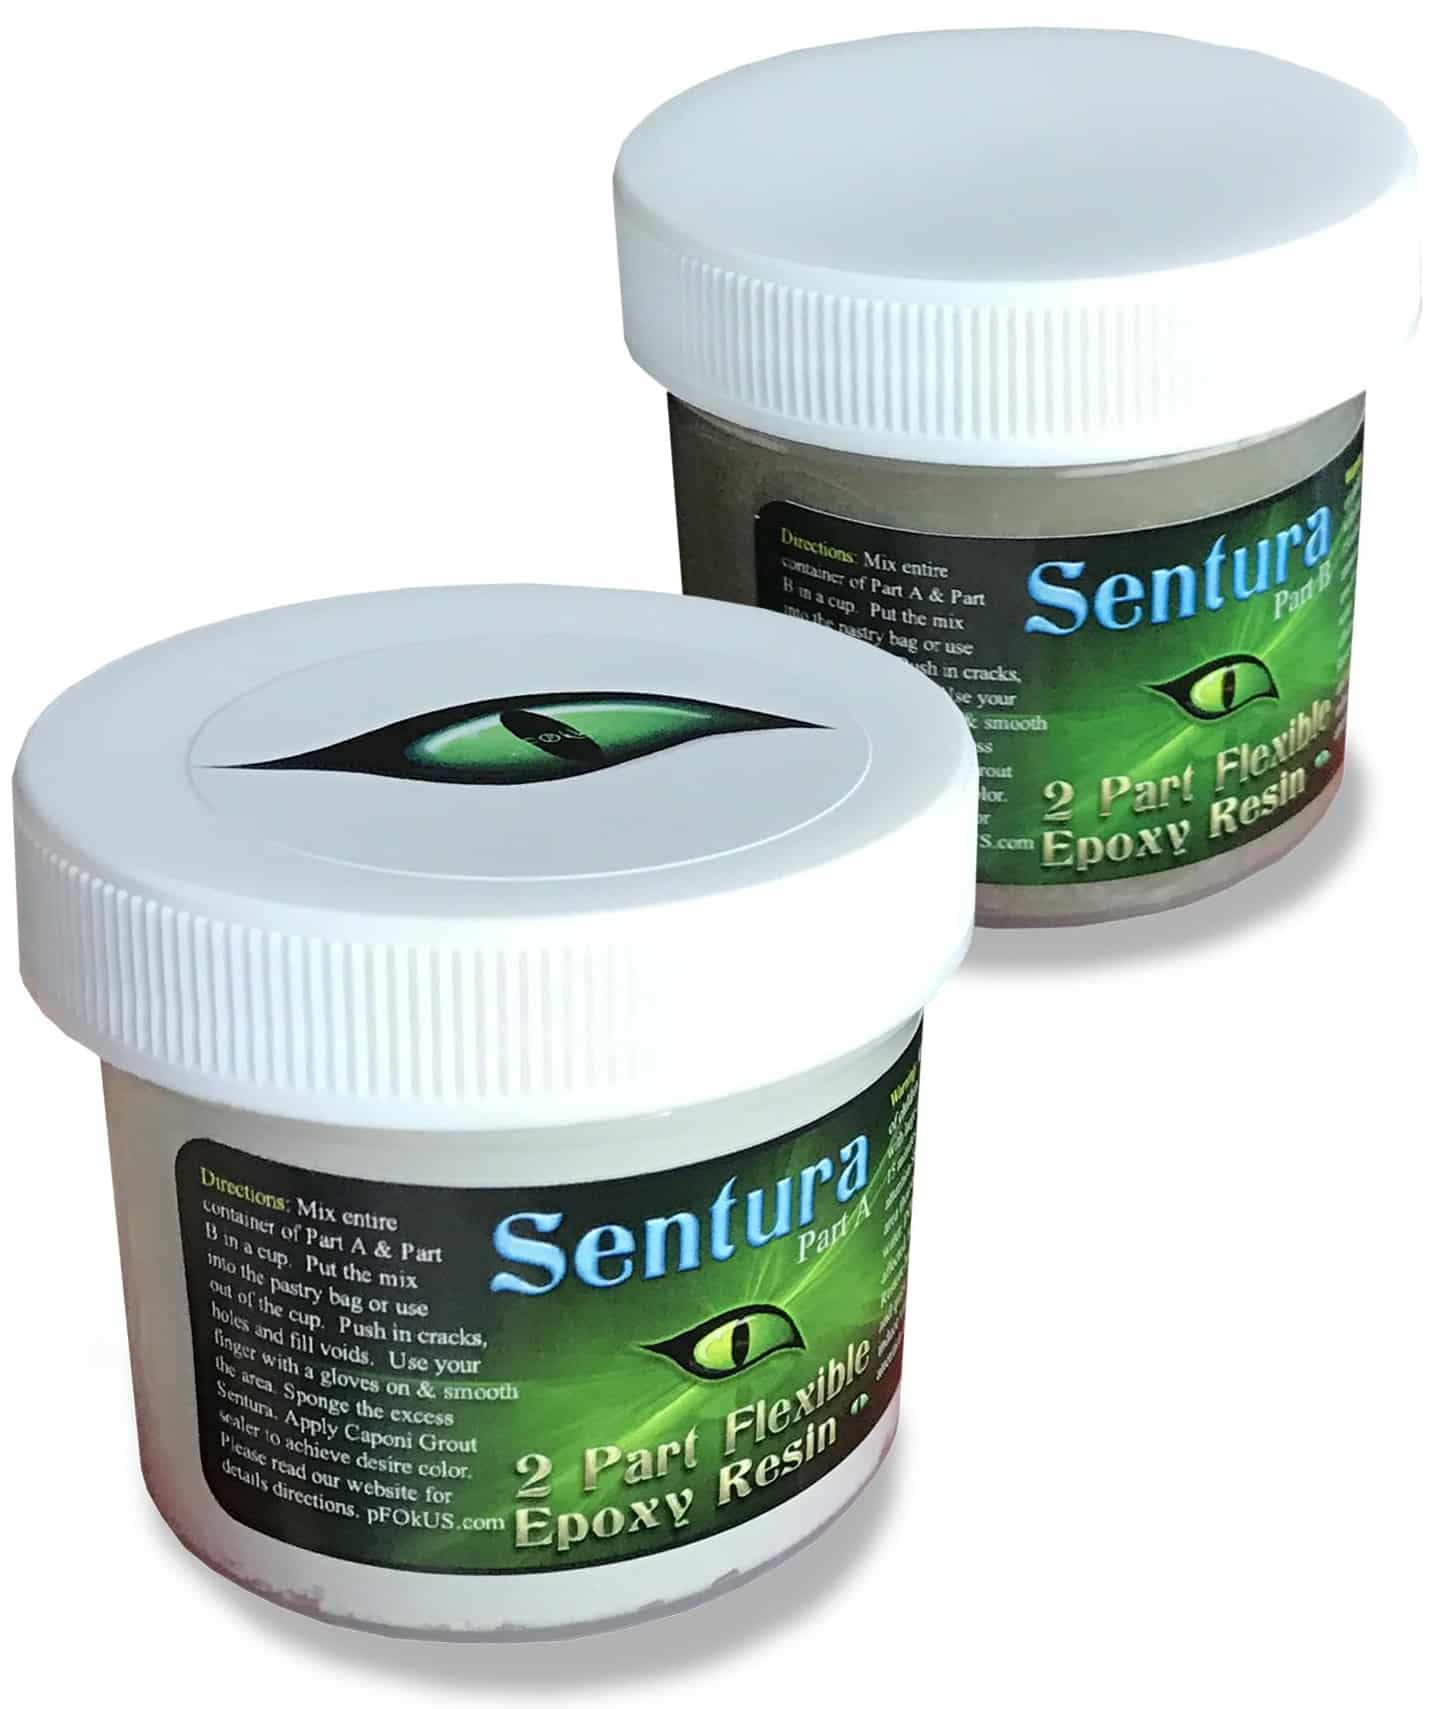
caulk substitute - Sentura - pFOkUS

Sentura is not just a product that eliminates caulk. It is also mold and mildew proof, stain-proof, waterproof and does not peel. It also does not appear bulky like caulk. It can be shaded with Caponi – pFOkUS’colored grout sealer, in more than 40 shades, so that you can match your grout to the rest of the tile surface.

Why is Sentura better than Caulk?

  • Sentura will never soften or peel in wet settings and will waterproof the corners.
  • It will never crack in dry settings.
  • Sentura can not be damaged with harsh chemicals.
  • It can be pigmented in over 40 colors to make your shower look natural.
  • Unlike caulk, it provides a beautiful look in showers with its sleek and durable lines.
  • Sentura also comes in use to repair cracked tile and grout.

Here are Sentura installation directions explained in-depth, so that you seal your shower corners effectively and permanently. Now you can get rid of mold and mildewed caulk, damaged caulk, peeling caulk and cracking caulk forever.
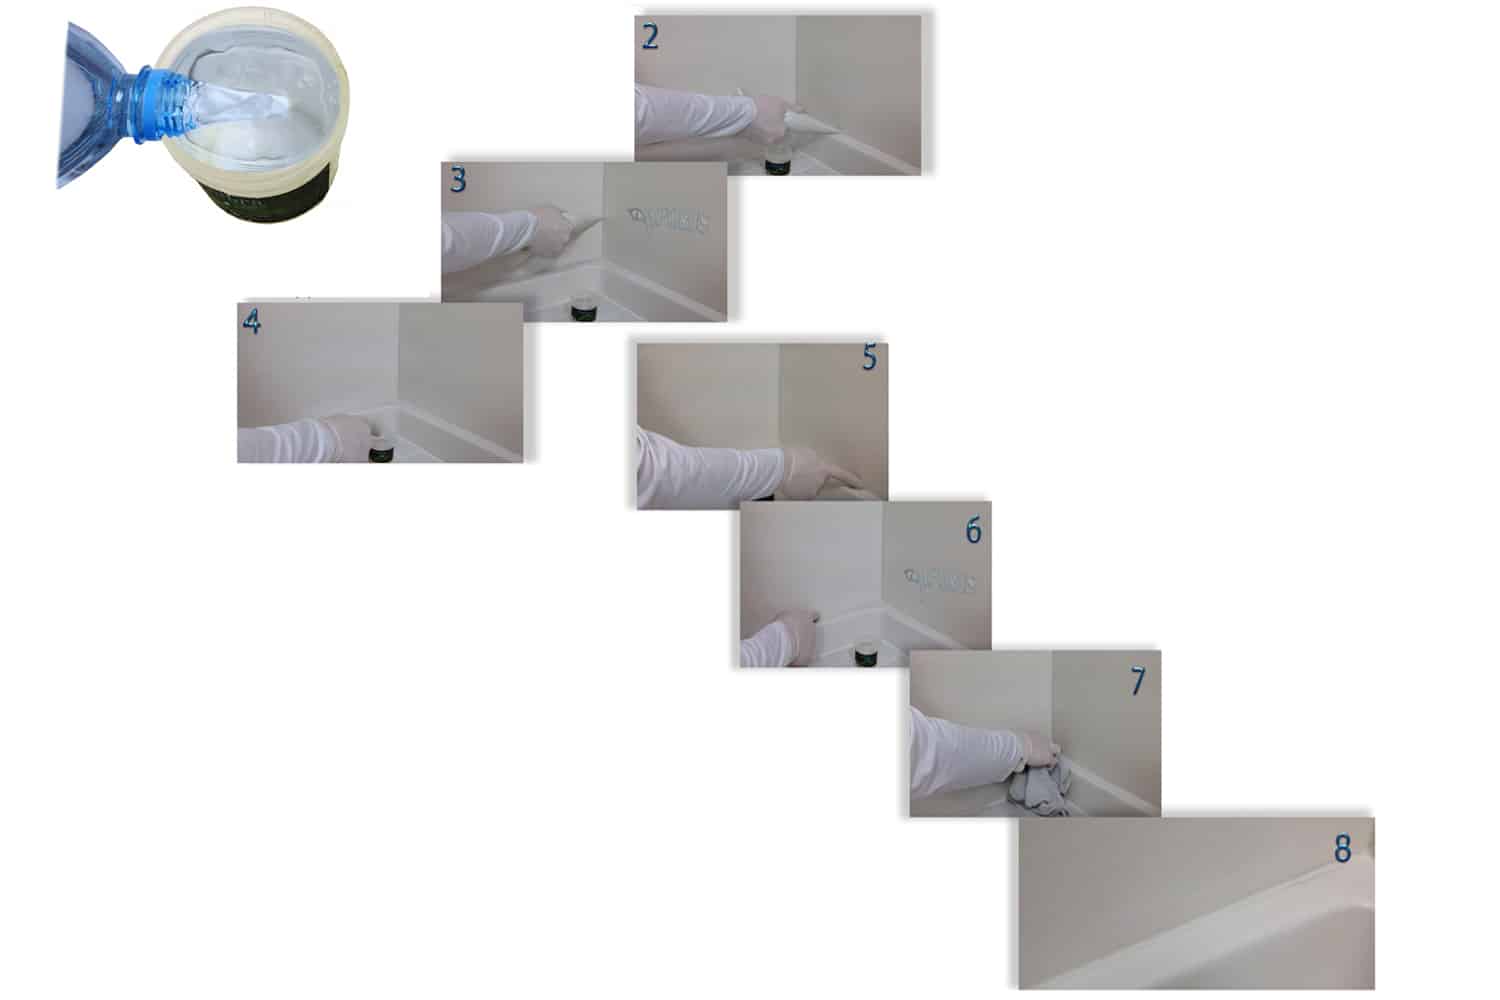
How to Apply Sentura?

how to applay - Sentura

  • After all the caulk and grout has been removed from the corners, you can begin application of Sentura.
  • Add all part A and part B contents in the empty container.
  • Mix thoroughly in the empty container.
  • Put mixed material into the applicator bag.
  • In one of the empty Sentura containers, fill water. This will be used to smooth the Sentura out.
  • Apply Sentura to all the edges filling the void. Try to make a smooth bead while applying from the applicator bag, so there is little to no wiping requirement later.
  • Apply all the Sentura in the applicator bag before smoothing. The Sentura will harden up in the applicator bag which will make it harder to squeeze out if smoothing is mixed with application. There will be plenty of time to smooth the Sentura after application.
  • Once all the Sentura has been applied, dip your finger in the Sentura jar filled with water. The Sentura is not affected by water, it will help with smoothing the Sentura.
  • Smooth the Sentura with your finger in long paths of back and forth motion. Ensure that you are pressing the Sentura in the corner.
  • As you are smoothing the Sentura, wipe the excess off your finger on the side of the jar. You can later use this Sentura, if you need more to be applied in the area.
  • A wet towel can be used to wipe excess Sentura. Next, smooth again with your finger and water.
  • Your task is now completed.

How To Pigment Sentura To Match the Area?

Sentura, at times, can turn yellowish over time. To prevent this, we advise you to coat the top of Sentura with Caponi. It is our epoxy grout sealer available in 40 different colors. Caponi has a durable titanium base which does its work in just a single coat. It is a pigmented grout sealing system that is built on a rock-solid 2-part solvent titanium resin/epoxy foundation. It is made in such a way that it can cover all grout in just one coat. Caponi can be simply brushed over top of the Sentura. You can choose from over 40 colors to color-match your Sentura to the rest of the tile surface.

Sentura can be used around the corners of many surfaces, including block, natural stone, toilets, tubs, brick, concrete and much more. Above we have explained shower caulk removal and installation directions in-depth to give your surfaces a healthy makeover. We hope now you have got a clear idea why caulking is bad and why Sentura is an ideal solution.


0 Comments

Leave a reply

Your email address will not be published. Required fields are marked *

*


©2020 pFOkUS® - All Rights Reserved

CONTACT US

We're not around right now. But you can send us an email and we'll get back to you, asap.

Sending

Log in with your credentials

Forgot your details?